
We live the year of the bots. Bots are being spawned everywhere to make our lives easier and to automate things. For us developers, this is not so new since we are familiar with bots that take care of our CI, deploy our code or gently notify us when things are not perfect with our production installation.
For normal people though, this is a huge revolution. With Slack, Microsoft's BotFramework, Skype and now Facebook's bots for Messenger, the masses can now interact with their AI assistant like never before.
This means that the opportunities for creating a custom AI assistant are endless.. Let's get botting.
Getting started with BotFramework

BotFramework is one of the easiest and most promising ways to start your bot. With BotConnector your can easily connect your bot to different services, like Slack, Skype or even Email and SMS. You just implement a simple API and then BotConnector will make sure your bot will understand any of the compatible chat applications. Also, BotFramework comes with client libraries for Node.js and C#, which you could use to simplify your life. Last, but definitely not least, these client libraries contain integrations with LUIS, Micrsoft's Language Understanding Intelligent Service which powers Cortana and which you can use in order to make your bot smarter, or even train it to reply to your intents!
For this tutorial, we're going to use BotConnector's Node.js client library with a restify-enabled Node.js project.
Creating your first bot from our ready-made Node.js template
In order to help you get started really fast with BotFramework in SourceLair, we've prepared a ready-made Blueprint that will bootstrap a Node.js project with everything you need to get started. You can find the Blueprint here.
This Blueprint will do the following things for you:
- Create a new SourceLair Node.js project
- Clone our template from GitHub
- Install the needed NPM dependencies
- Expose your application to your public URL, so that you can view it in your browser
Throughout the process, you'll need to add several configuration variables in your project, so now is a good time to create a new file named .env in your project. Copy and paste the contents of the .env.example file for now and we'll fill the different options during the next steps.
Registering your bot to BotFramework's website
In order for everything to work, you'll need to register a new bot. Sign in with your Microsoft account and authenticate BotFramework.
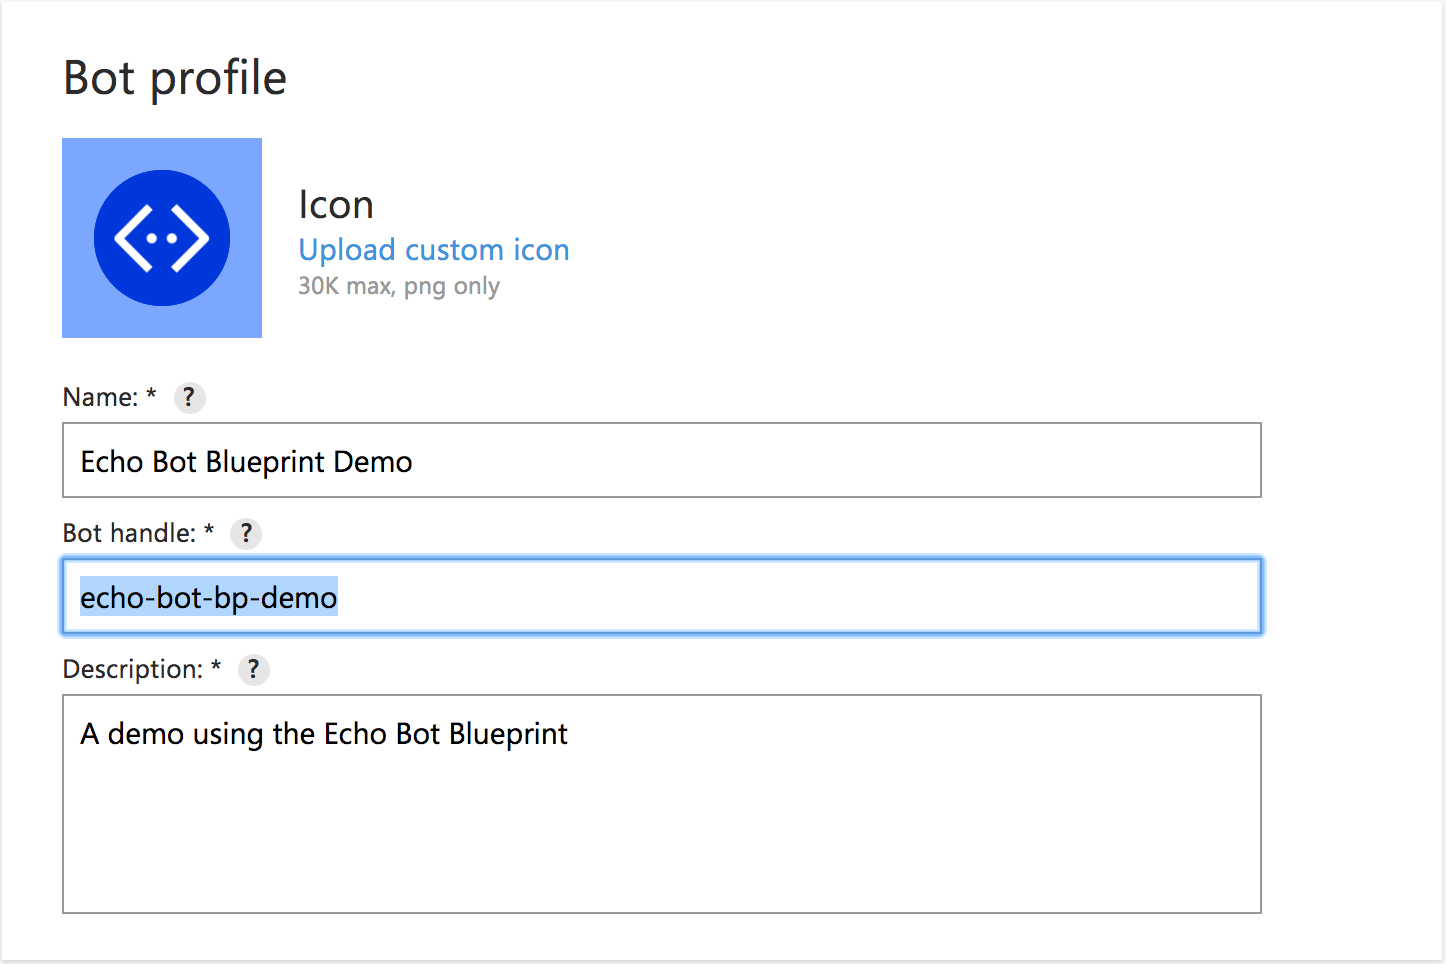
Then, fill the required fields
- in the Name field, enter a name to identify your bot
- in the Bot handle field, enter your bot's handle - this should be unique accross all Bot using BotConnector
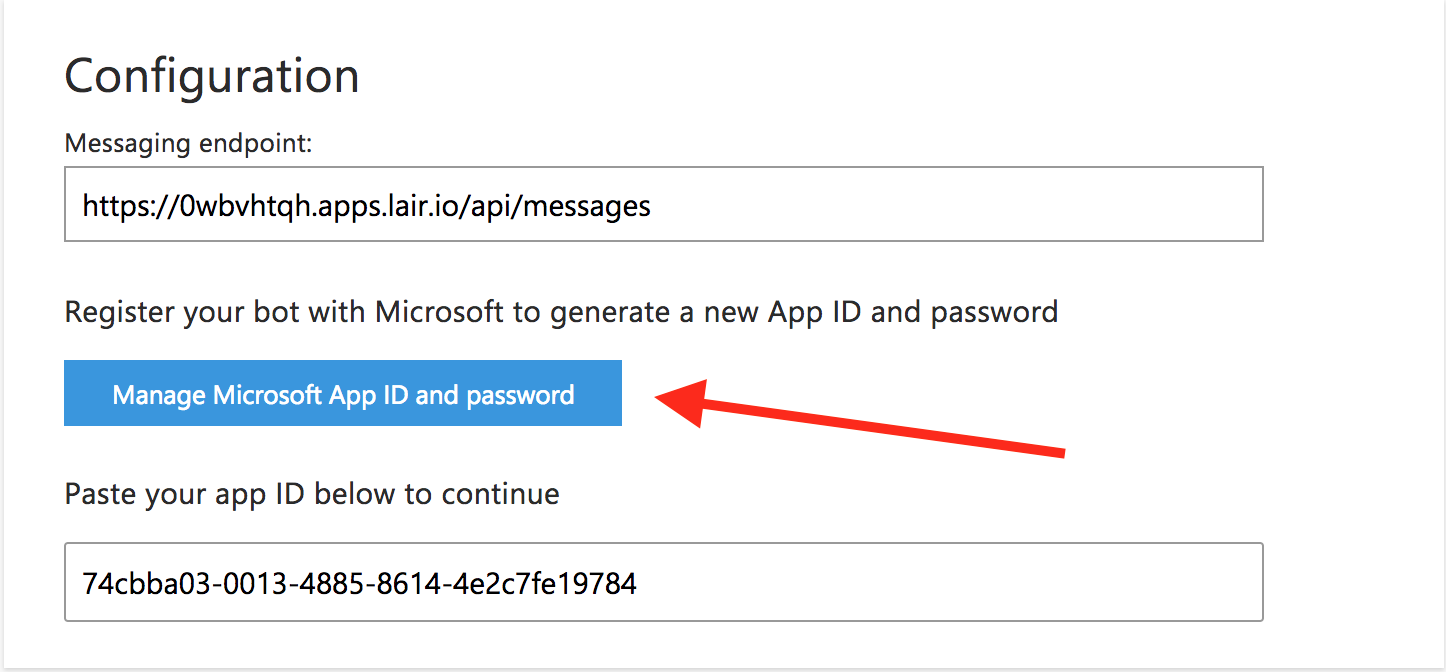
- in the In the Messaging endpoint field, fill in your public URL, after appending
/api/messagesat the end, iehttps://0wbvhtqh.apps.lair.io/api/messages
Now, click the Create Microsoft App ID and password button to create a new application.
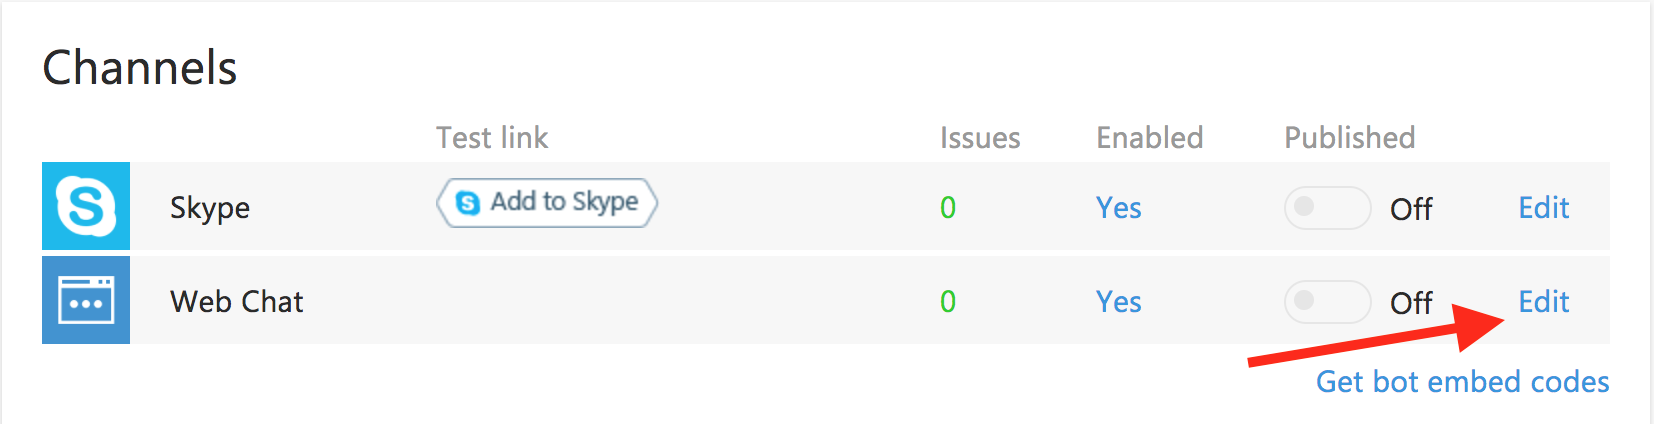
Setting up the web chat for testing
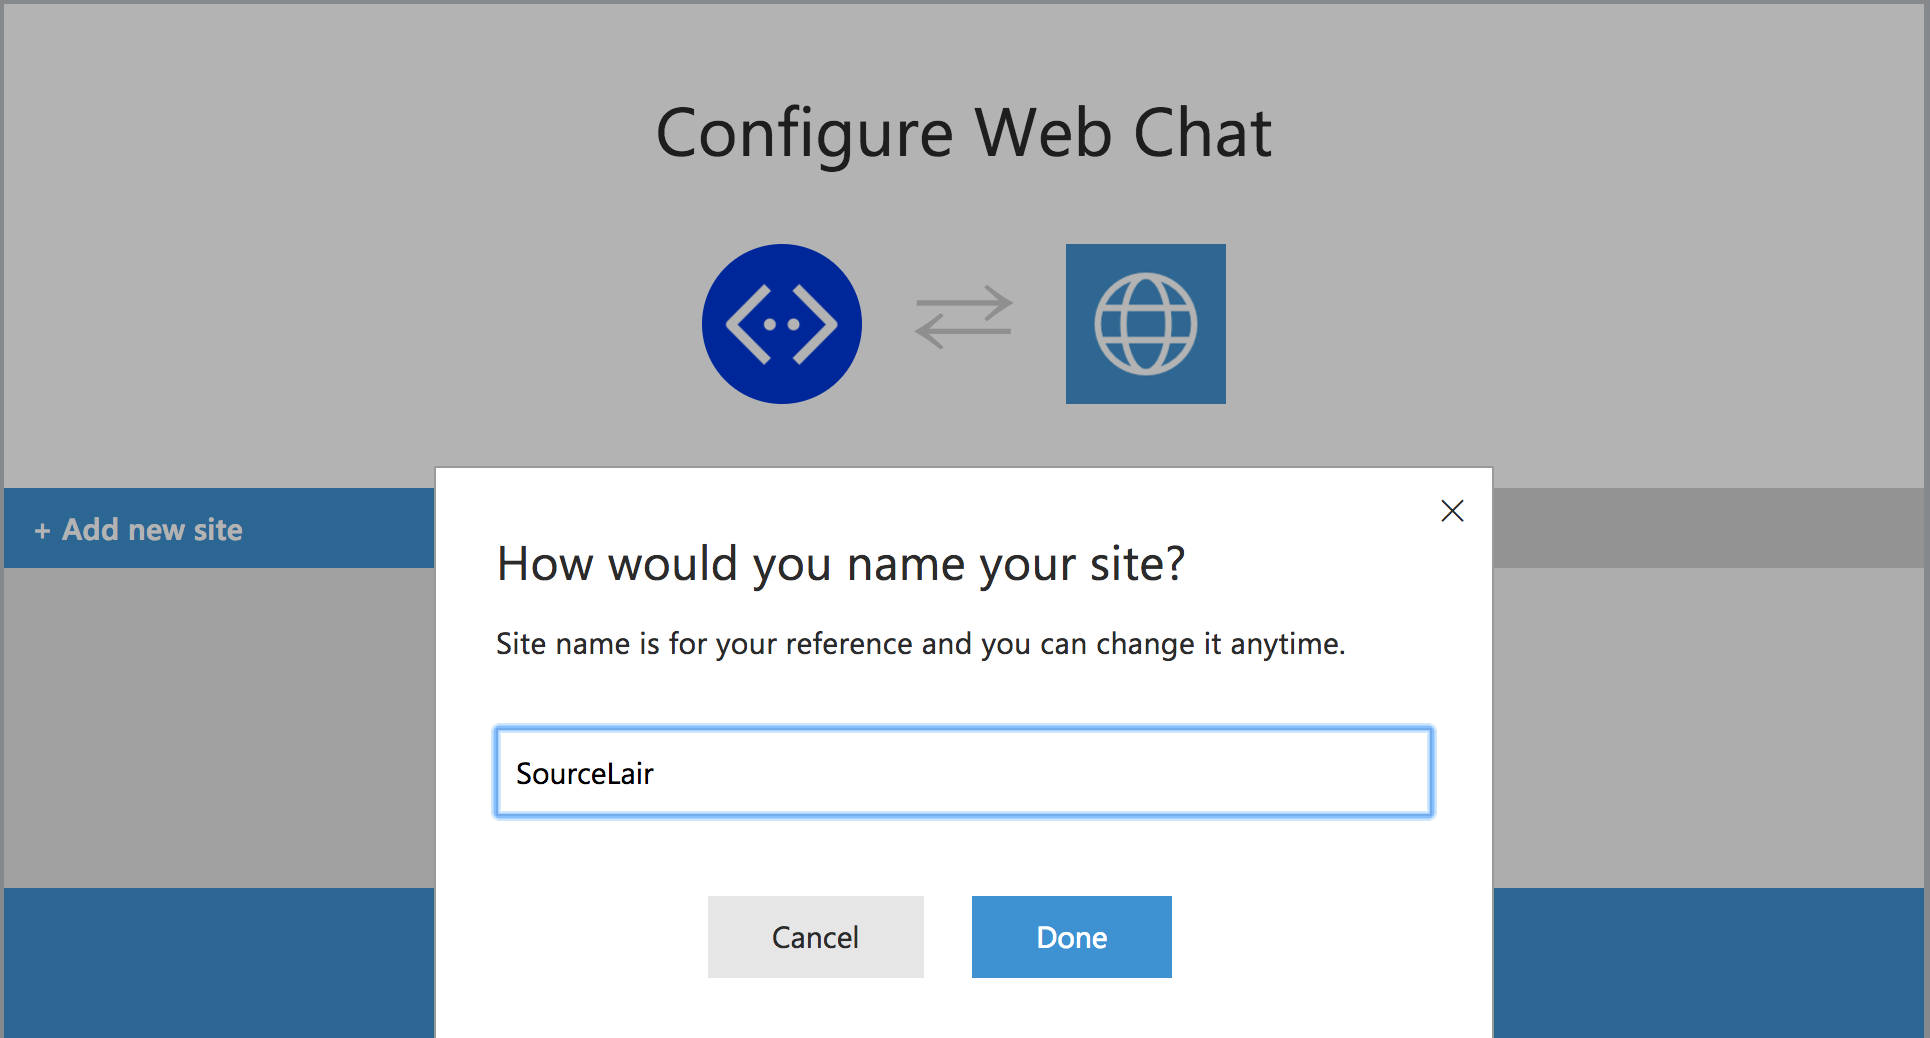
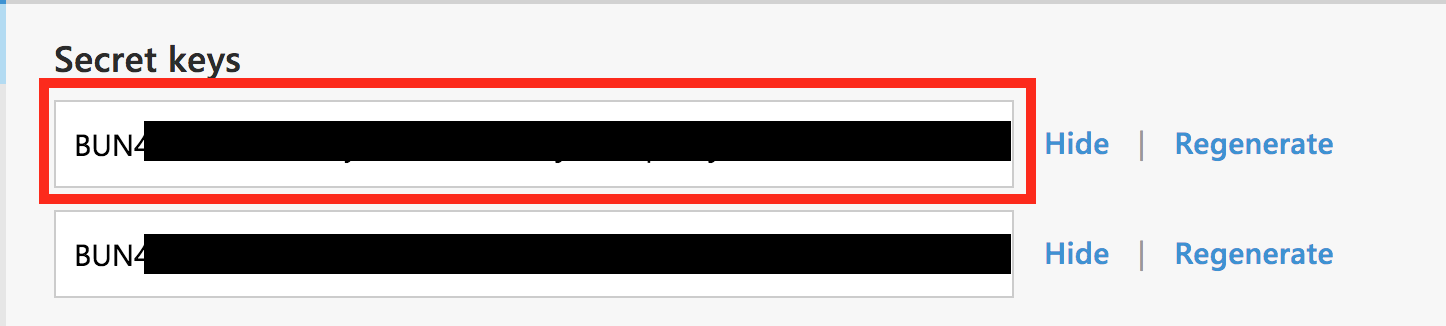
BotFramework also includes a handy iframe code which you could use in order to easily and quickly test your Bot. Open the Web Chat settings by clicking edit to generate a new iFrame secret.
Create a new site named SourceLair.
Giving life to your Bot
Now that you're done with your BotFramework setup, there's just one last step left - connect your Bot to BotFramework and enjoy it! Save your .env file and your server will restart automatically. Your .env file should look like the one below, only with different values:
BOT_HANDLE=echo-bot-bp-demo
APP_ID=ae8331b2-49a9-4375-91c7-f65dc61a7e56
APP_PASSWORD=PKtQWUb2K2cZQ6uS
APP_IFRAME_SECRET=BUN4OUnwZfo.BrALQJLbLm6gQ5DXdaPzRwzMwbSZ6jYpZV5WVE
These are the values that you acquired during the previous steps.
Testing your bot
Bot testing is difficult, since your bot needs to live in the internet. That's no problem in our case though, since your SourceLair projects live online and they're always accessible using your public URL. All you have to do is open your public URL and the Web Chat will be there waiting for you. Try to send something to your bot and watch it reply. Beware though, it only knows basic stuff yet.

Add more queues to your bot
Now that you have verified that your bot is working, you only have to save your changes and your bot will automatically reload to answer all your questions. Let's - for example - teach your bot to track IP address location. For this example, we'll use the ip-api.com service.
Let's install the request package, type in your terminal:
npm install --save request
and import it in our app.js:
const request = require('request')
Now that we have request, let's add one more queue. First, open the app.js file (either using the file explorer, or quick open with Ctrl + Shift + O or Cmd on a mac) and add a new match:
.matches(/^ip/, builder.DialogAction.beginDialog('/ip'))
and now enter the new dialog:
helloBot.dialog('/ip', [
    (session) => {
        builder.Prompts.text(session, 'Which IP you\'d like to track?');
    },
    (session, results) => {
        var ip = results.response;
        request('http://ip-api.com/json/' + ip, function(error, response, body) {
            if (error) {
                session.send('Ooops, there was an error with your request "%s"', error);
                session.endDialog();
                return;
            }
            if (response.statusCode != 200) {
                session.send('Ooops, we got a wrong status code "%s"', response.statusCode);
                session.endDialog();
                return;
            }

            try {
                body = JSON.parse(body);
            } catch(err) {
                session.send('Hmmm, the server responded with a wrong resopnse, interesting...');
                session.endDialog();
                return;
            }

            if (body.status !== 'success') {
                session.send('There\'s something wrong here, does this help? "%s"', body.message);
                session.endDialog();
                return;
            }

            session.send('Hooray, the IP is located at %s, %s', body.city, body.country);
            session.endDialog();
        });
    }
]);
That's it, ask your bot about your IP of choice now!

Deploy your bot
In SourceLair, we support different deployment flows, from using our Heroku or git-ftp integrations, to any deployment service using plain Git. Choose your favorite and present your bot to the word!
Wrap up
Congrats on your first bot. Let this be the start of an awesome new AI. We hope you'll enjoy playing with it as much as we do. Shoot us an email with your bot's public URL at [email protected] and we might have a little surprise for you.
You can also go back to BotFramework and integrate your bot with your favorite service - it's that easy!
